Tired of sun and rain ruining your tractor work? Building your own canopy is easier than you think! This guide provides a step-by-step process, perfect for both beginners and experienced DIYers. Let's get started and create a shade solution tailored to your needs. For more detailed plans, check out this helpful resource.
Planning Your Shade Solution: Measure Twice, Cut Once
Before lifting a tool, meticulous planning is key. This phase determines your canopy’s success. Consider these crucial aspects:
Tractor Dimensions: Accurately measure your tractor's width, length, and height. This dictates the canopy's size. A quick sketch is invaluable. Don't rush this step! Inaccurate measurements lead to a poorly fitting canopy.
Material Selection: Steel offers superior durability but often requires welding skills. Wood provides a more rustic aesthetic but demands regular maintenance. Consider long-term durability and your own skillset. What material best suits your needs and budget?
Attachment Method: How will the canopy attach to your tractor? Clamps might suffice for lightweight canopies, while heavier models may require bolts or more robust customized solutions. Ensure the attachment is secure and won't compromise tractor operation. Think about safety first, and always prioritize strong, reliable mounting.
Local Regulations: Check local building codes and property regulations before you begin. You might need permits or face height restrictions. This preventative measure saves potential future headaches.
Gathering Your Supplies: Your DIY Arsenal
With your plan finalized, gather your materials. This list provides a solid foundation, but adjust quantities based on your specific design.
| Item | Quantity (Adjust as needed) | Notes |
|---|---|---|
| Measuring Tape | 1 | Precise measurements are critical. |
| Saw (Circular or Hand) | 1 | Select a saw appropriate for your chosen material (steel or wood). |
| Drill | 1 | With drill bits sized for your fasteners. |
| Bolts, Nuts, Washers | As needed | Choose sizes appropriate for the canopy's weight and material. Oversized fasteners ensure superior strength and stability. |
| Frame Material | As needed | Steel tubing or lumber, depending on your selection. Consider gauge thickness for steel and lumber dimensions for wood. |
| Covering Material | As needed | Canvas, heavy-duty tarp, polycarbonate, or other weather-resistant material. |
| Safety Glasses | 1 | Eye protection is non-negotiable. |
| Work Gloves | 1 | Protect your hands from potential injuries. |
| Other Tools | As needed | Level, wrench, pliers, welding equipment (if using steel), etc. Have all your tools ready before starting. |
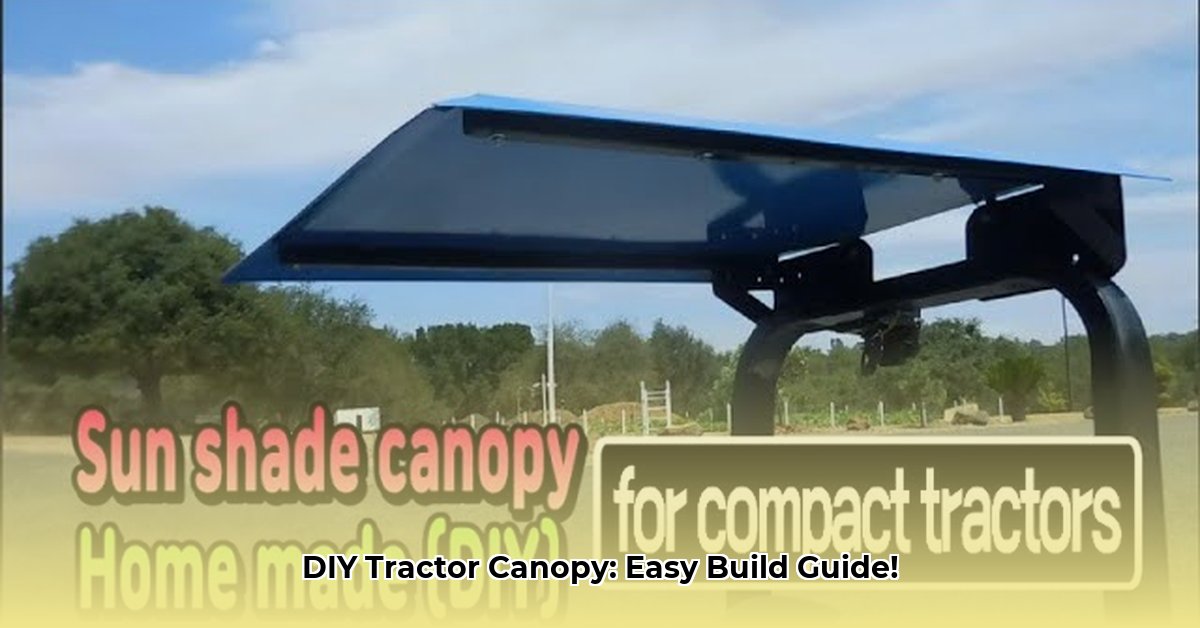
Building the Frame: The Backbone of Your Project
The frame's strength and accuracy are paramount. Regardless of your chosen material, precise measurements and sturdy construction are essential. Take your time; this stage lays the groundwork for a successful project.
Step 1: Precise Cutting: Cut frame pieces to your pre-calculated dimensions. Double- and triple-check measurements to prevent frustrating errors later. Accuracy is paramount at this stage.
Step 2: Frame Assembly: Connect the pieces using your chosen fasteners (bolts, welding). Ensure the frame is square and robust. Use a level for perfect alignment. A square and level frame is the foundation of a successful canopy.
Step 3: Stability Assessment: Gently rock the frame. If it wobbles, add bracing or reinforcement for increased stability and longevity. A stable frame is essential for a safe and long-lasting canopy.
Adding the Cover: Shade and Protection
This section adds functionality and aesthetic appeal. Choose a covering material that provides sufficient shade and protection from the elements.
Step 1: Measuring and Cutting: Carefully measure the finished frame and cut your covering material, adding extra (6-12 inches) for overlap and secure fastening. Accurate cutting is crucial for a neat and professional finish.
Step 2: Secure Attachment: Attach the covering using appropriate fasteners (rivets, straps, staples). Ensure the fabric is taut and evenly stretched to prevent sagging and maintain aesthetics.
Step 3: Reinforcements: Add reinforcement patches at stress points (corners, edges) to extend the canopy's lifespan. This crucial step prevents premature damage and maintains the canopy's integrity.
Mounting Your Creation: The Final Stretch!
Securely attach your canopy to the tractor using your pre-planned mounting system. Before operating the tractor, rigorously double-check all connections for strength and security. Your safety is the top priority. This step is crucial: a poorly secured canopy could be dangerous.
Key Takeaways and Next Steps
Building a DIY tractor canopy provides significant advantages, including cost savings and customization. However, it requires time and effort, and some DIY skills are necessary. Remember, accuracy and safety are paramount throughout the entire process. Now, go build your own shade solution!